Descargue el documento oficial Cliente OpenVPN.

Ejecute la configuración con privilegios de administrador y siga los pasos de instalación. Confirme los mensajes de seguridad de Windows.
Abra el explorador de archivos y navegue hasta el directorio donde descargó el archivo de instalación del cliente OpenVPN. De forma predeterminada, este es el directorio "Descargas". Seleccione el archivo de instalación con clic izquierdo, luego haga clic derecho sobre él y haga clic izquierdo en "Ejecutar como administrador".

Haga clic en "Siguiente >"

Haga clic en "Acepto" si está de acuerdo con el acuerdo

Haga clic en "Siguiente >" de nuevo

Haga clic en "Instalar"

Es posible que este cuadro de diálogo no aparezca.
Haga clic en "Instalar" si aparece el cuadro de diálogo Seguridad de Windows.
Esto instalará el adaptador de red TAP-Windows Provider V9 necesario para que OpenVPN funcione.

Haga clic en "Siguiente >" de nuevo

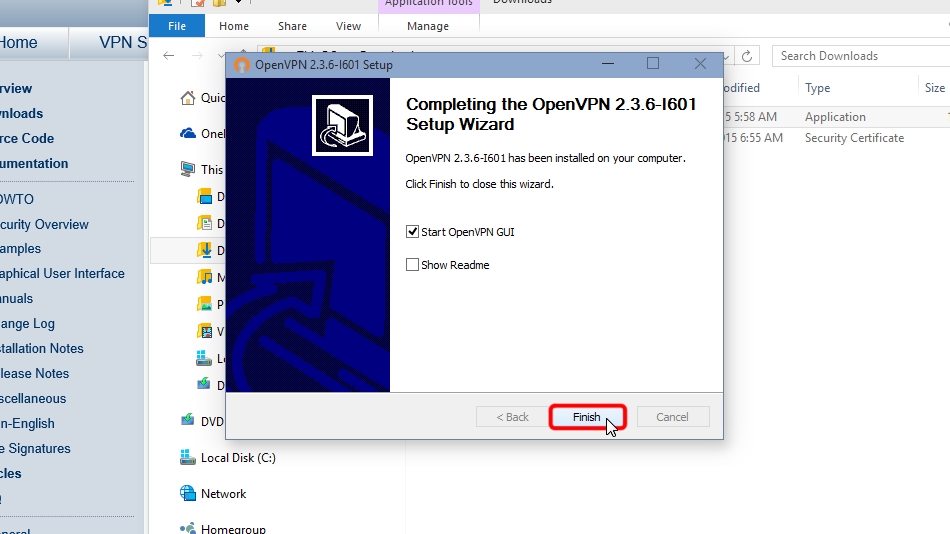
Haga clic en "Finalizar"

De esta manera tendrás instalado OpenVPN Client
Configurar OpenVPN
Descargue los archivos de configuración. Si desea almacenar su información de inicio de sesión de forma permanente en formato de texto abierto y sin cifrar, descargue los siguientes archivos:
Archivo OpenVPN (.ovpn): OCULTO. Entre o Regístrese para ver.
En caso de que NO desee almacenar su nombre de usuario / contraseña sin cifrar en userpass.txt y desee ingresar el nombre de usuario / contraseña manualmente cada vez que se conecte a Trust.Zone (más seguro), descargue el siguiente archivo de configuración de OpenVPN
Archivo OpenVPN (.ovpn): OCULTO. Entre o Regístrese para ver.
Copie los archivos descargados en la carpeta de configuración de OpenVPN (de forma predeterminada C:/Program Files/OpenVPN/config/) y confirme los mensajes de seguridad de Windows.
Aquí están las instrucciones en detalle: Descargue los archivos de configuración, abra la carpeta "Descargas", seleccione los archivos de configuración descargados, seleccione los archivos, haga clic derecho sobre ellos y haga clic en "Copiar".
 Trust.Zone-VPN
Navigate to your OpenVPN "config" folder, by-defalut this is "C:Program FilesOpenVPNconfig" and paste config file(s) there: right click on free space in folder then click "Paste".

Haga clic en "Continuar" para proporcionar permiso de administrador para copiar archivos.

Ahora tiene los archivos de configuración en el lugar correcto.
 Trust.Zone-VPN
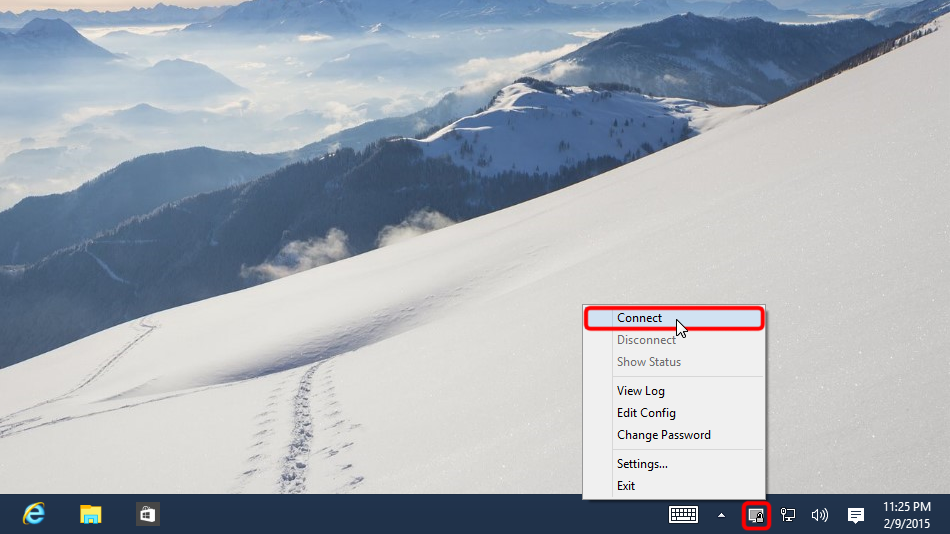
En caso de configuración de conexión única. Haga clic con el botón derecho en el icono de la bandeja de OpenVPN y haga clic en "Conectar".

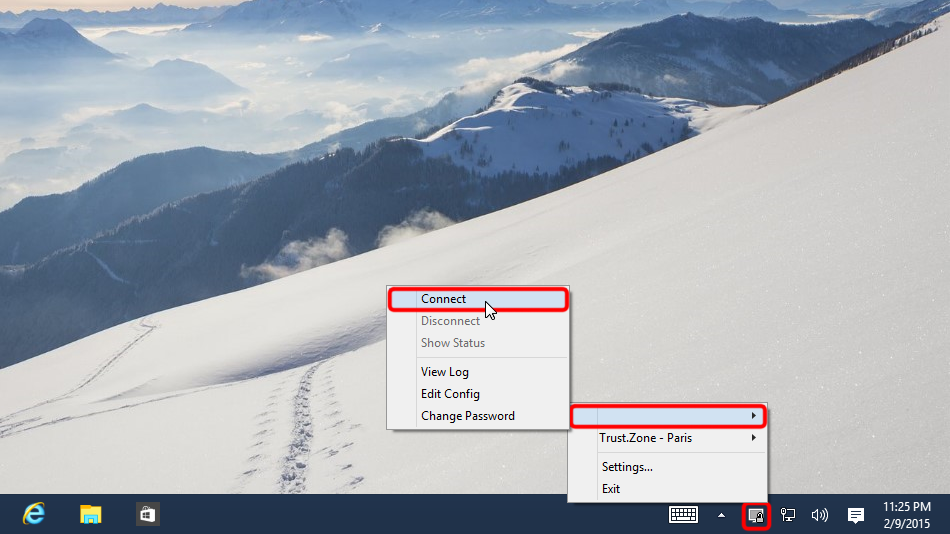
En caso de que tenga varias conexiones configuradas. Haga clic con el botón derecho en el icono de la bandeja OpenVPN, seleccione la ubicación que desea conectar y haga clic en "Conectar".
 Trust.Zone-VPN
Ingrese el nombre de usuario y la contraseña (en caso de que no haya utilizado userpass.txt)
Your VPN Username: OCULTO. Entre o Regístrese para ver.
Your VPN Password: OCULTO. Entre o Regístrese para ver.
 (Trust.Zone-VPN)
Una vez que la conexión se ha establecido con éxito, el icono de OpenVPN se vuelve verde. Puede administrar su conexión VPN con OpenVPN.
 Trust.Zone-VPN
Abra la página oprincipal de Trust.Zone y vuelva a cargarla si ya está abierta para comprobar si su conexión con Trust.Zone VPN está establecida correctamente.
También puede visitar nuestra página de verificación Connection.
 Tu IP: x.x.x.x ·
  Reino Unido ·
¡Estás en TRUST.ZONE ahora! ¡Tu verdadera localización está oculta!